Contacts
The main screen of the MeshCore app is your primary interface for viewing and managing contacts on the mesh network.
Adding Contacts
You can add contacts to your device in several ways. To access the Add Contact screen, go to Menu → Add Contact.
Manual Contact Entry
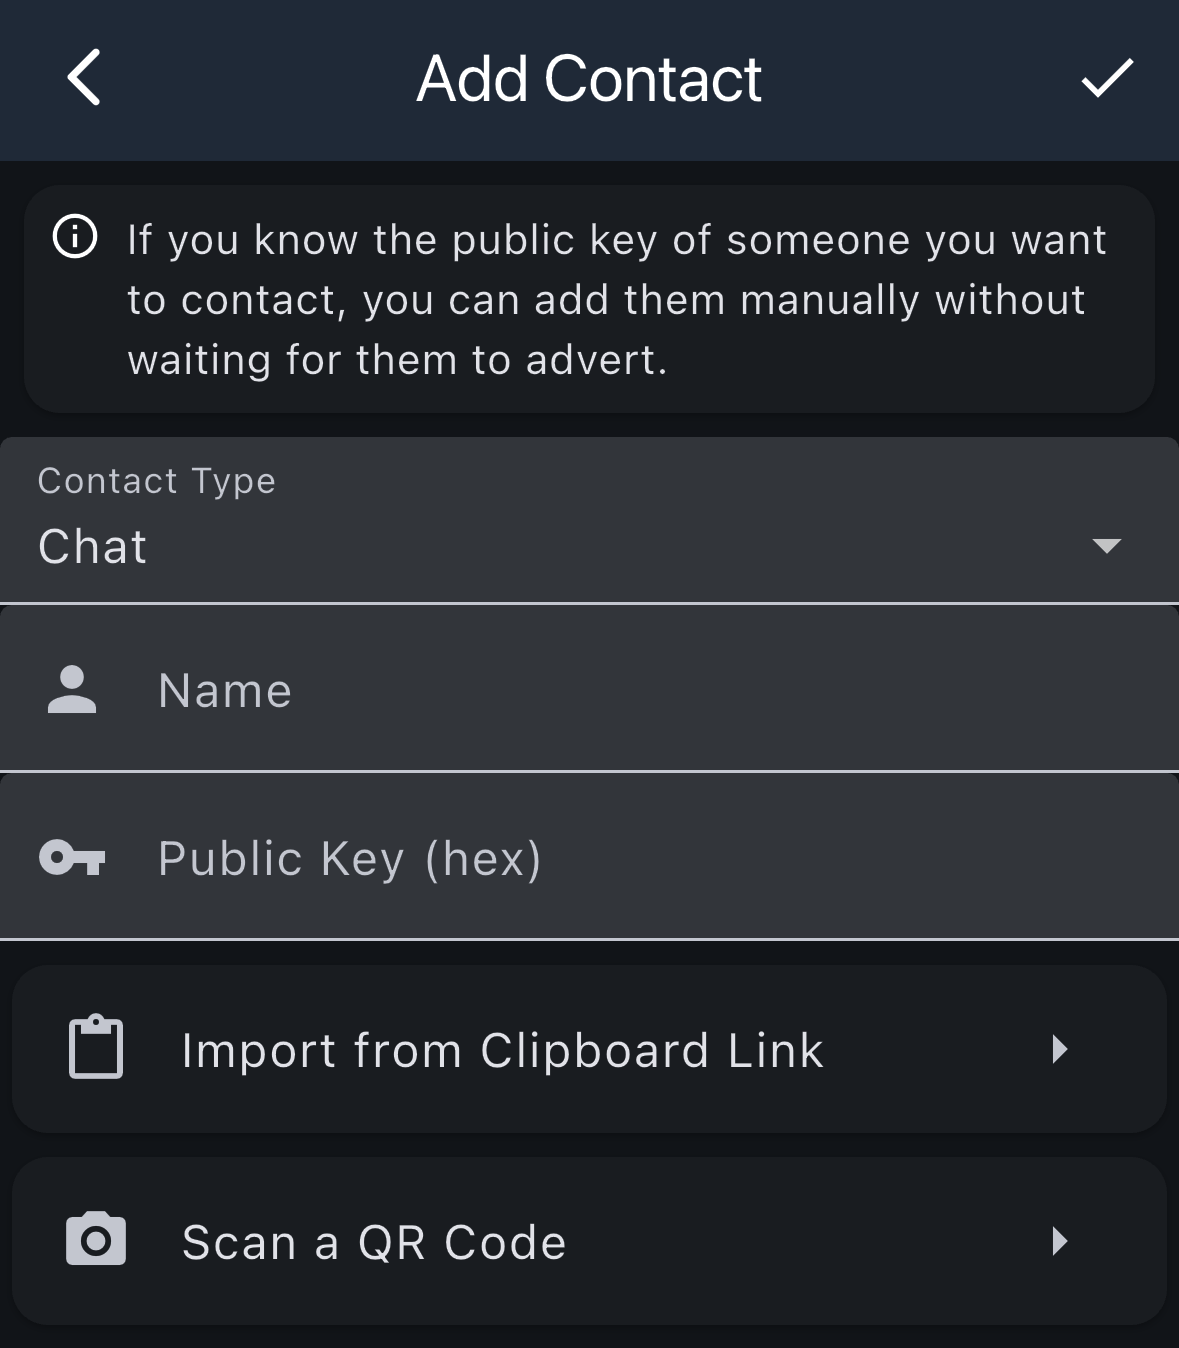
If you know the public key of someone you want to contact, you can add them manually without waiting for them to advert.
Required Information:
- Contact Type: Select the type of contact (Chat, Repeater, Room Server, etc.)
- Name: Enter a display name for the contact
- Public Key (hex): Enter the contact's public key in hexadecimal format
After entering the information, tap the checkmark icon to save the contact.
Alternative Methods
| Method | Description |
|---|---|
| Import from Clipboard Link | Import contact information from a link copied to your clipboard |
| Scan a QR Code | Scan a QR code to add a contact (useful when someone shares their contact code) |
You can also discover contacts automatically by using the Discover Contacts option from the menu, which shows a list of nodes that have advertised on the mesh network.
Contact List
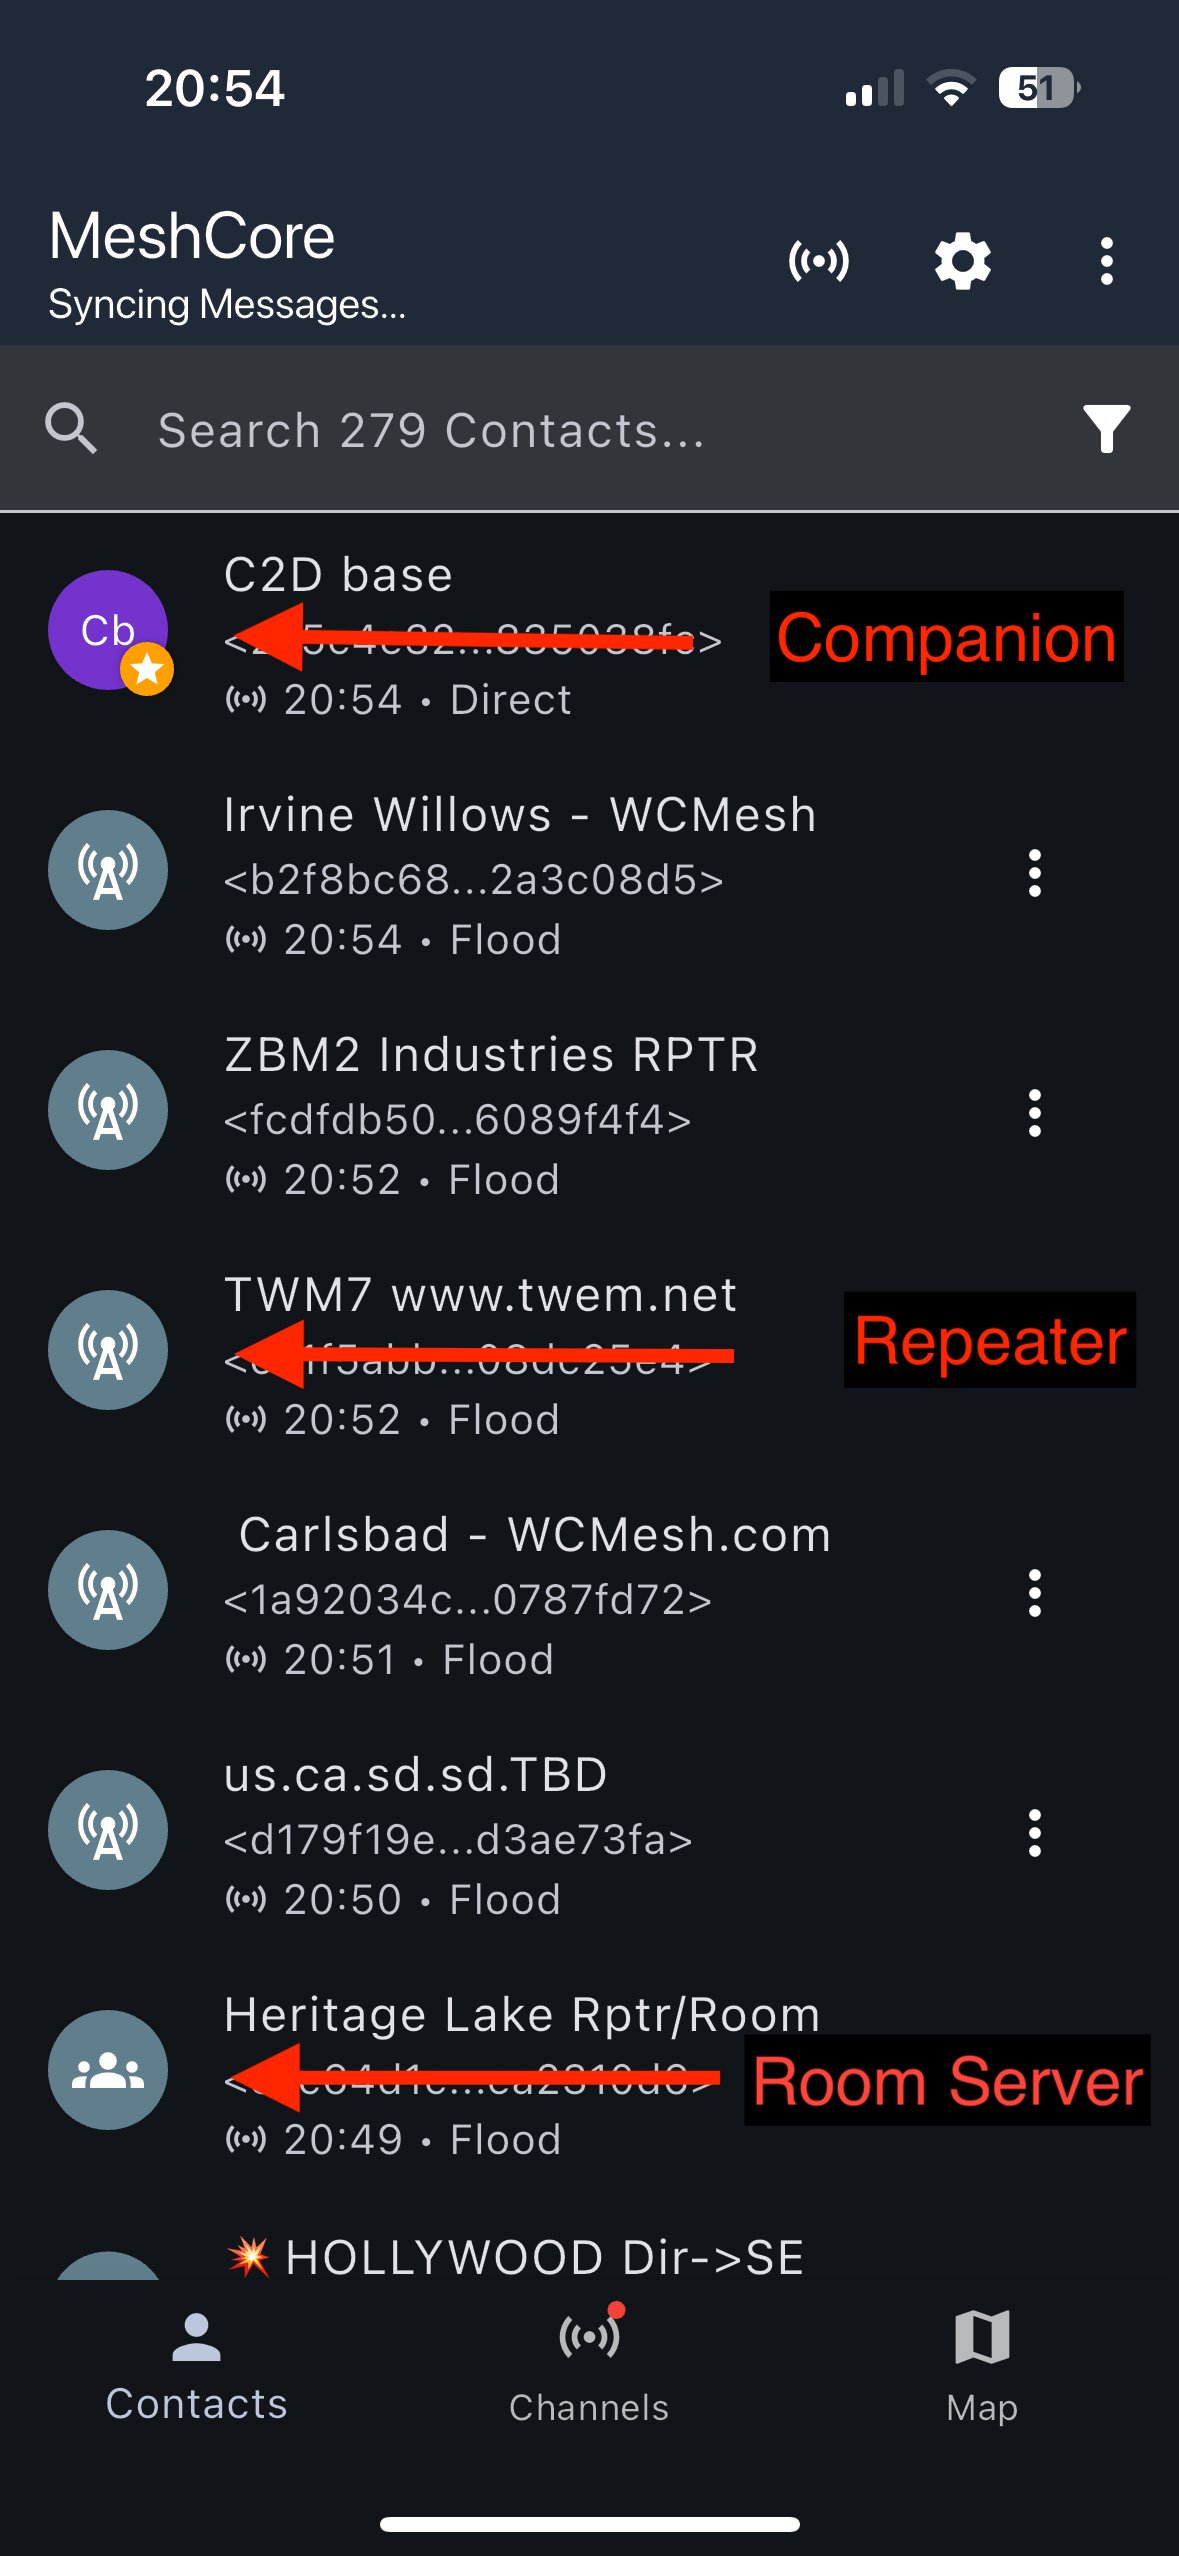
The main area of the screen displays your contact list, showing all the companions, repeaters, and room servers you've added from the mesh network.
Contact List Features
- Search Bar: Use the search bar at the top to quickly find contacts by name or public key
- Contact Entries:
- Icon: Visual indicator showing the type of node (Companion, Repeater, Room Server)
- Name: The display name of the contact
- Public Key: The unique identifier (hex address) for the node
- Route Path: Last known advert status showing timestamp and route path (Direct, Flood, X Hops)
- Menu Options (⋮): Tap the three-dot menu on individual contacts for more options
Companion Menu Options
| Button | Description |
|---|---|
| Details | Shows the companion details page |
| Share | Shows the share contact options |
| Set Path | Manually set a path to the node |
| Reset Path | Resets path to flood |
| Remove Contact | Deletes contact from device |
| Favourite | Adds node to favourite's list |
Repeater/Room Server Menu Options
| Button | Description |
|---|---|
| Details | Shows the companion details page |
| Share | Shows the share contact options |
| Set Path | Manually set a path to the node |
| Reset Path | Resets path to flood |
| Ping (Zero Hop) | Pings repeater and returns SNR if in direct contact |
| Remove Contact | Deletes contact from device |
| Favourite | Adds node to favourite's list |
Contact Details
When you tap the three-dot menu (⋮) next to a contact and select Details, you'll see a detailed view of the contact's information.
Action Buttons
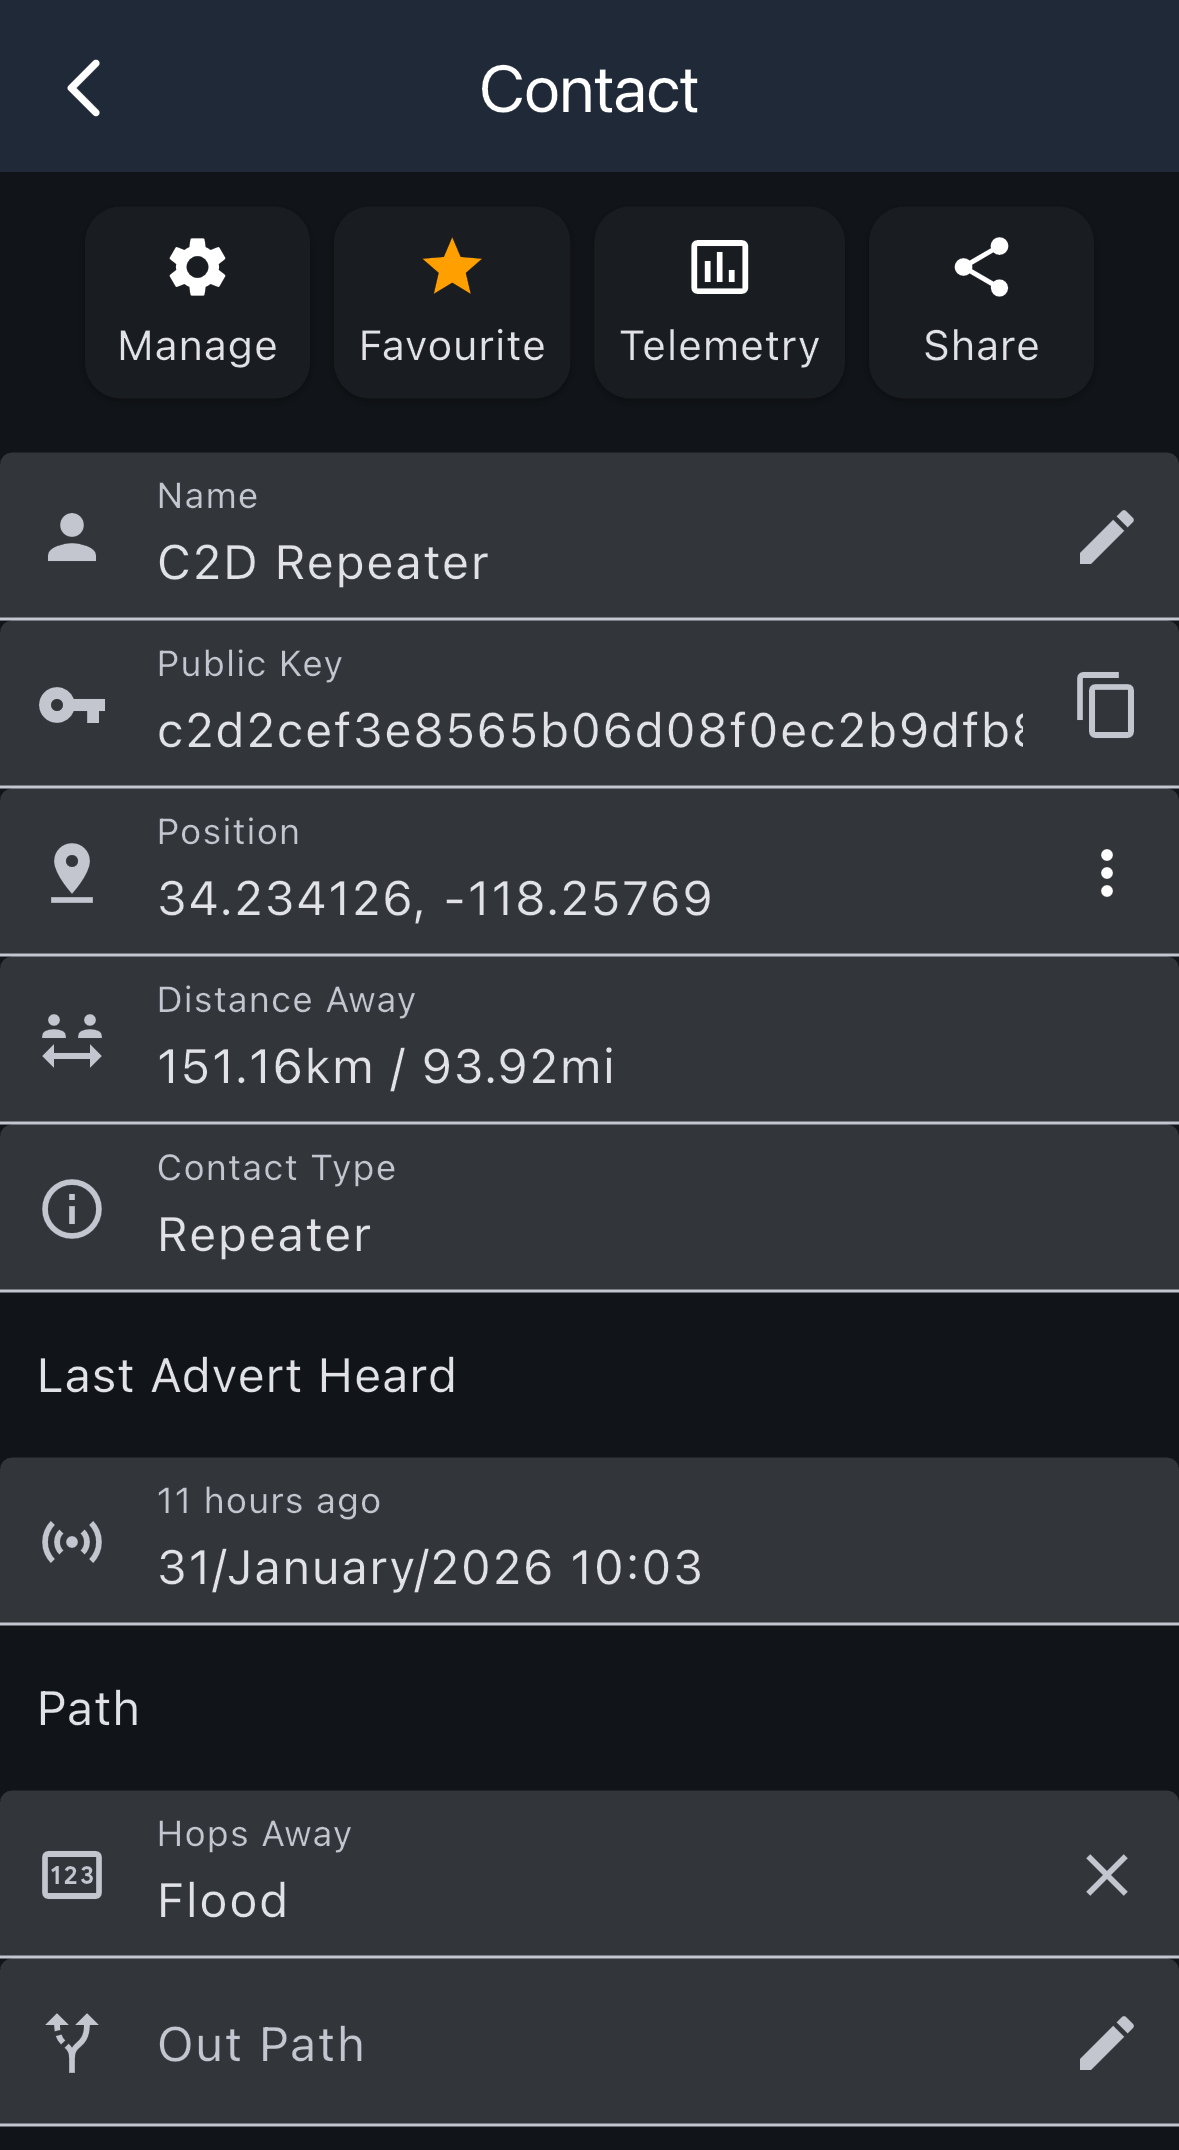
At the top of the contact details screen, you'll find four action buttons:
| Button | Description |
|---|---|
| Manage | Access management options for the contact |
| Favourite | Add or remove the contact from your favourites list (yellow star indicates favorited) |
| Telemetry | View telemetry data from the contact (if available) |
| Share | Share the contact information with others |
Contact Information
The main section displays detailed information about the contact:
- Name: The display name of the contact (tap the pencil icon to edit)
- Public Key: The contact's unique public key identifier (tap the copy icon to copy to clipboard)
- Position: GPS coordinates (latitude, longitude) if the contact shares their position
- Distance Away: Calculated distance to the contact in kilometers and miles
- Contact Type: The type of node (Companion, Repeater, Room Server, etc.)
Last Advert Heard
This section shows when you last received an advert from this contact:
- Time: How long ago the advert was heard (e.g., "11 hours ago")
- Date and Time: The exact date and time the advert was received
Path Information
The Path section displays routing information:
- Hops Away: Shows how many hops away the contact is, or "Flood" if using flood routing. You can clear the path by tapping the X icon.
- Out Path: The configured path for sending messages to this contact. Tap the pencil icon to manually set or edit the path.
Contact Tools
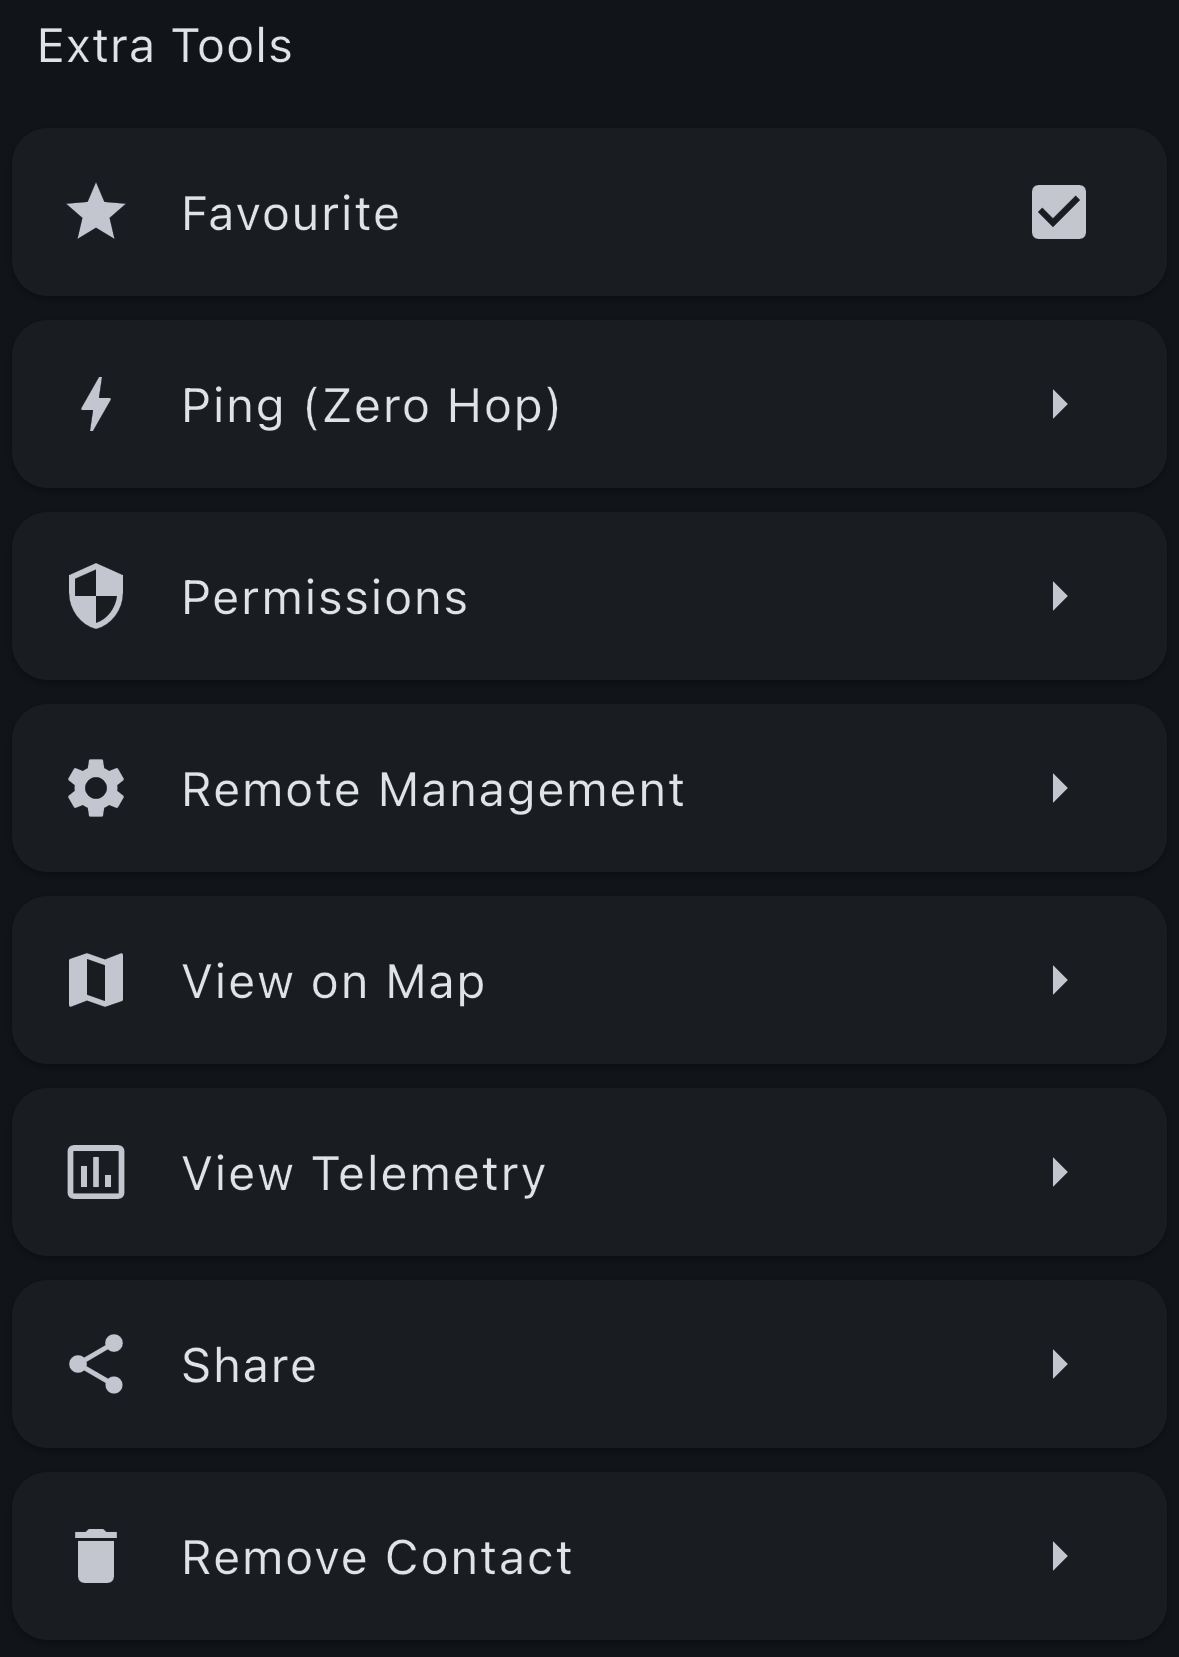
From the contact details screen, you can access additional tools by tapping the Manage button. This opens the Extra Tools menu with various options for managing the contact.
Available Tools
| Tool | Description |
|---|---|
| Favourite | Add or remove the contact from your favourites list (checkbox indicates if currently favourited) |
| Ping (Zero Hop) (Repeater Only) | Ping the contact and get SNR (Signal-to-Noise Ratio) if in direct contact |
| Send a Message (Companion Only) | Send a direct message to the contact |
| Permissions | Configure permissions for this contact |
| Remote Management (Repeater only) | Access remote management options for the contact |
| View on Map | View the contact's location on a map |
| View Telemetry | View telemetry data from the contact |
| Share | Share the contact information with others |
| Remove Contact | Delete the contact from your device |
These tools provide additional functionality for managing and interacting with your contacts beyond the basic contact information displayed on the details screen.